This winter season, for the first time, I decided to try my hand at growing microgreens to help maintain a flow of fresh greens throughout the cold season. The results have been rewarding.
Microgreens are miniature plants from a wide variety of different seeds. They differ from sprouts in that they are allowed to fully develop their first few leaves (sprouts are harvested as soon as the seeds germinate). This results in greens that are packed with flavor, whereas sprouts have a mild flavor but pack a big crunch.
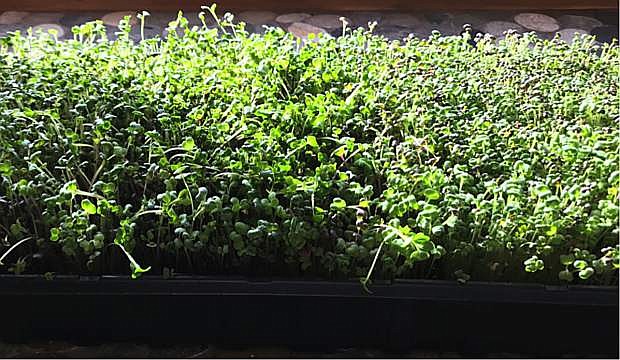
Microgreens are grown in soil and take between one to three weeks to grow. These little powerhouses are substantially more nutritious than their larger counterparts.
Due to the wide variety of seeds you can raise:
Cauliflower, broccoli, cabbage, watercress, radish and arugula, lettuce, endive, chicory and radicchio, dill, carrot, fennel and celery, garlic, onion, leek, amaranth, quinoa swiss chard, beet spinach, melon, cucumber and squash. Sunflower seeds, cereals such as rice, oats, wheat, corn and barley, as well as legumes like chickpeas, beans and lentils.
You are able to achieve the flavors you most enjoy. You can do mixes that produce mild to spicy flavors, or you can do single seed plantings that suit your specific palette. Either way — they are a quick, easy and nutritious option and can be grown in the smallest of environments.
My method is to use a couple of large plastic planting trays (without holes or seed cell divisions). Drill holes in one container so it can drain into the second container. I do like a plastic cover (my cat seems to think microgreens are very tasty!). Purchase your seeds of choice — organic is a must! Soak larger seeds (sunflower, pea, mung, etc.) in water for several hours (smaller seeds do not require). I then place organic soil into the container to fill it half- to three-quarters full. Spread the seeds generously (really — you want the entire area covered with seeds — careful to get the edges). Lightly pack, sprinkle with more soil, lightly water, place your lid and set in a sunny window or under a growing light. In anywhere from one to three weeks, you will have yourself delicious edible greens. When you are ready to harvest, simply take a pair of sheers and cut them as close to the soil as possible. Set them in a bowl and let them dry out. Once dry, you can store in plastic in the refrigerator. When you are ready to use, wash them well and spin in a lettuce spinner. These can now be found in the organic section of many grocery stores as well.
Now for the best part: Add these little gems to everything and anything you can imagine. They are great in scrambled eggs or omelets, on sandwiches, burgers or fresh spring rolls, to top pizza, mixed in with salad mix or as a salad on their own. Likewise, they can be added to smoothies, flavored waters or even sorbets and other deserts. In general, these are a flexible and nutrient rich addition to your everyday diet. I am including a recipe for one of my favorite uses of microgreens — pesto. I like to keep recipes open-ended, so I will give you the recipe with additional options and tell you to take it away! With fresh wholesome food, you really can’t go wrong…
If you want pesto for spreading on sandwiches, as pizza sauce or as a topping for your favorite pasta, you might want to choose different ingredients than if you are planning it as an appetizer dip with crackers. Likewise — perhaps you desire a sweeter pesto to dip fresh fruits or as a compliment to meats and/or cheeses. Here are some ideas:
Savory pesto:
3-5 cloves of garlic peeled
½-1 cup of macadamia nuts (walnuts, pinenuts, almonds, cashews, etc.)
-or seeds: sunflower, pumpkin, sesame
¼ cup grated Pecorino Romano (Parmesan, age cheddar, Cotija, Asiago, Manchengo)
-optional for vegan version
Salt and pepper to taste
2 Cups packed fresh baby spinach (basil, cilantro, leafy greens, kale, green peas)
2 Cups packed fresh microgreens (mild, spicy, or your favorite vegetable flavor)
¼ cup extra virgin olive oil or avocado oil
2 Tbs fresh lemon juice
Place garlic in food process and pulse until coarsely chopped, add nuts, cheese, salt, pepper and pulse until finely chopped. Add greens and pulse while slowly adding olive oil and lemon juice until you have a nice, smooth consistency. Place in airtight container in refrigerator for up to a week. Pesto also freezes well. Place in ice cube trays or plastic containers for up to 6 months.
Sweet pesto:
Substitute fresh greens with sweet basil or mint, use mild mix microgreens, add honey, almond oil, pecans, fresh dates or figs and a pinch of salt.
Kate Johnson is a long-time resident of Carson City. She practices pharmacy locally at Costco Pharmacy and is an avid gardener, cook and lover of dogs.

Comments
Use the comment form below to begin a discussion about this content.
Sign in to comment